LUUM.IO
X-PoE - Amatis Integration Guide#
About This Guide#
Welcome to the integration guide for the XS-100 Series X-PoE lighting controller! In this guide, we will associate an X-PoE switch to a lighting controls site so that the ports can be programmed into rooms.
Note
This guide is only applicable to the Amatis Controls system.
Necessary Parts#
The following parts will be necessary to complete this guide:
- A functional IP network
- An X-PoE lighting controller
- An Amatis Border Router (AMBR)
System Setup#
Before getting started with the system configuration, ensure the devices are properly connected. The Amatis Border Router and X-PoE lighting controllers should all have power and be connected to the same network. Once all devices have power and are online, begin by connecting to the X-PoE lighting controller and the Amatis Border Router.
Amatis Border Router Setup#
Perform the following steps to ensure the Amatis Border Router is ready to integrate with an X-PoE lighting controls system:
- Update the AMBR to ensure it is on the latest firmware.
-
Follow these steps to set the AMBR to be the main AMBR for the site.
Note
This step only needs to be done for the main AMBR of the site. Do not do this for any additional child AMBRs of the site.
-
Perform the following steps to enable the local event bus:
- Begin by logging into the Amatis Configuration App.
-
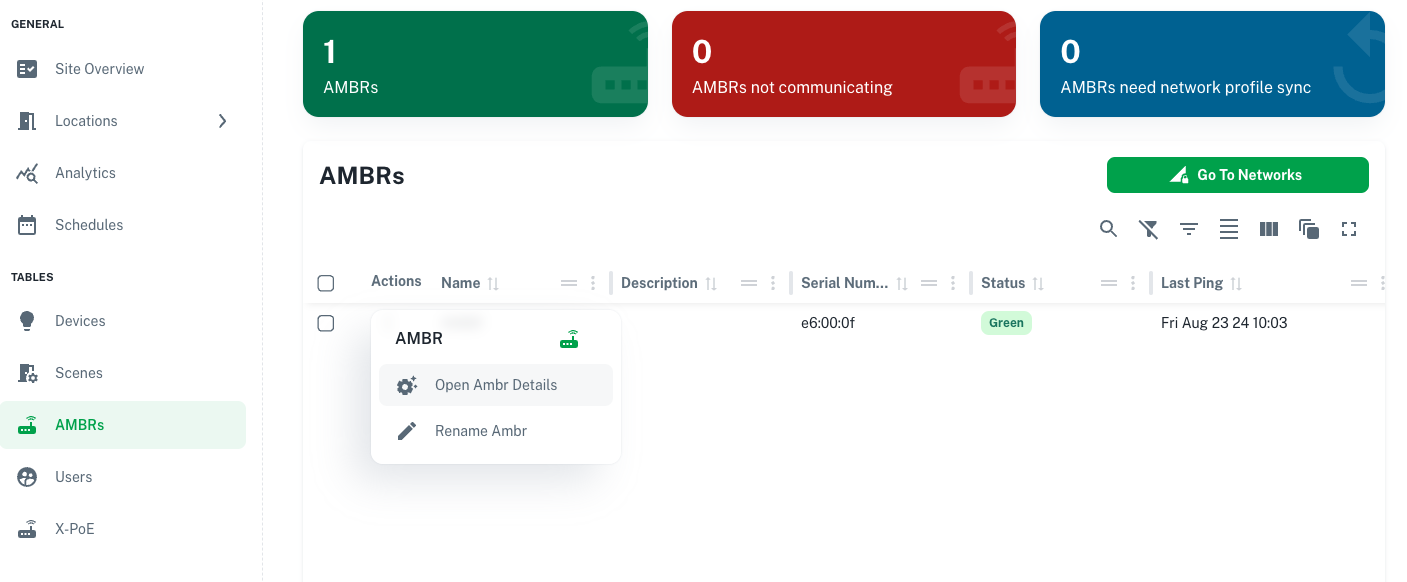
Navigate to the "AMBRs" table, select the three dots next to the AMBR, and select "Open AMBR Details".
-
Ensure "Local Event Bus Active" is set to "Enabled" and select "Save Changes".

Note
The local event bus must be enabled on all AMBRs that are a part of the site.
The Amatis Border Router is now ready to support X-PoE lighting controllers.
X-PoE Lighting Controller Setup#
Perform the following steps to ensure the X-PoE Lighting Controller is ready to integrate with an Amatis controls system:
- Update the X-PoE Lighting Controller to ensure it is on the latest firmware.
- Configure the channels on the X-PoE Lighting Controller.
- Connect the X-PoE lighting loads.
Site Association#
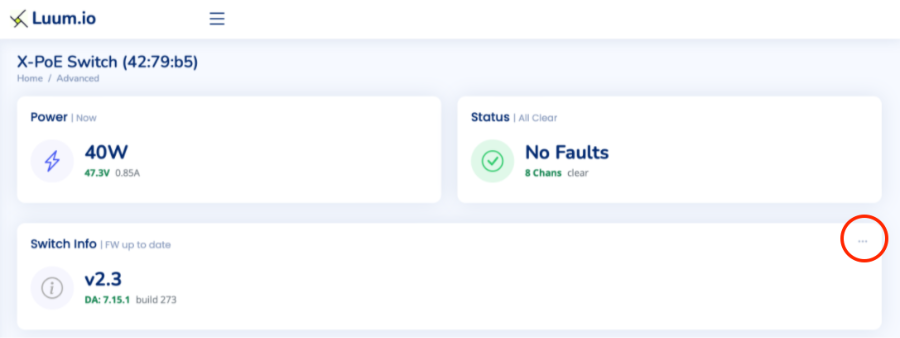
If there is only one main AMBR on the network, the X-PoE Lighting Controllers will automatically associate themselves to that AMBR. If this is not the case, or the X-PoE Lighting Controller is displaying the wrong site in the "Switch Info" section of the dashboard, perform the following steps to associate an X-PoE lighting controller to an Amatis Controls site:
-
Navigate to the configuration settings.
-
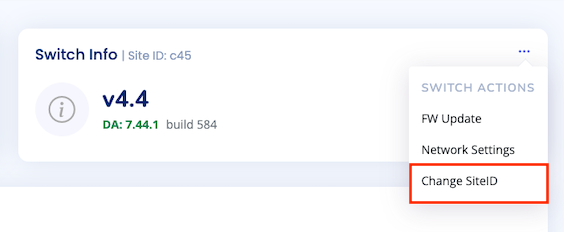
Select "General" and drop down the "Change Site ID" option in the configuration settings.
-
Enter the 3 character site ID of the site you wish to associate it with. This can be found in the URL of the Amatis App, or the first three characters of the main AMBR ID found on the bottom of the AMBR.
Example
An example AMBR ID looks like " _ _ _ 00F". When entering the site ID, only enter the first three characters of the AMBR ID, and ignore the 00F.
The X-PoE Lighting Controller has now been associated to the specified Amatis Controls site. The device and its outputs will now show up in the device table of the site and can be programmed into rooms.